
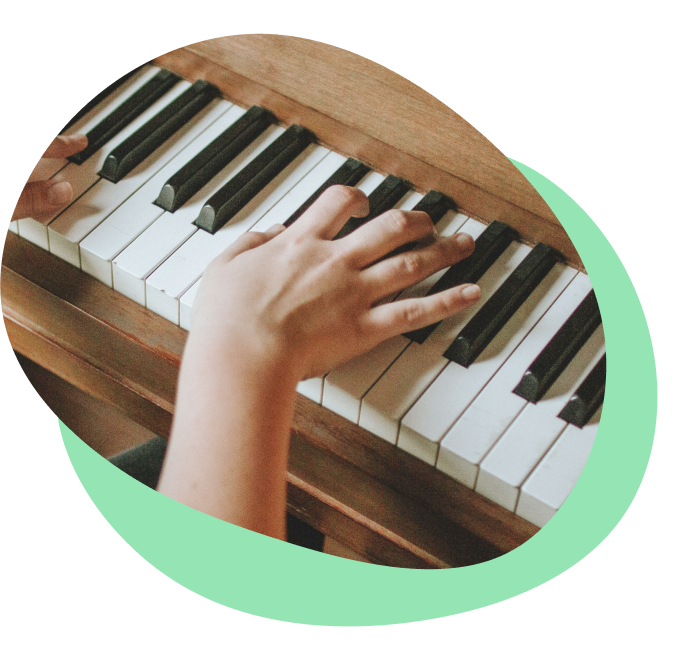


Starting your piano journey? “Mary Had a Little Lamb” is one of the easiest and most effective songs to begin with. With its simple melody and easy-to-remember notes, it’s a great way to build confidence and develop rhythm skills. It helps you get familiar with finger placement, timing, and note patterns—all while having fun. In this tutorial, I’ll walk you through everything you need to know to play it confidently!
Cheat sheet
| Artist | Sarah Josepha Hale |
| Composer | Sarah Josepha Hale |
| Release year | 1830 |
| Genre | Traditional / Nursery Rhyme |
| Difficulty level | Beginner |
| Instrument | Piano / voice |
| Key | C major |
| Meter | 4/4 |
| Techniques | Hands separately or together with simple melody |
“Mary Had A Little Lamb” chords and progressions
Learning “Mary Had a Little Lamb” on piano is straightforward and fun because it uses only three simple notes: E, D, and C. This simplicity makes it an ideal song for beginners to practice basic finger movements and coordination. Once you’ve learned the melody, you can add a simple C major chord in the left hand. The chord is C, E, G and it’s a nice harmony under the melody.
- C major chord: C-E-G
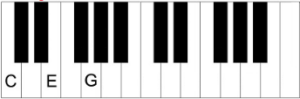
Try placing your right-hand thumb on C (1st finger), your middle finger on E (3rd finger), and your pinky on G (5th finger). Practice playing these notes together smoothly. Once comfortable, alternate between playing the chord and the melody of “Mary Had a Little Lamb” to build your piano skills further.
“Mary Had A Little Lamb” is perfect for beginners
This classic nursery rhyme has been around for generations, making it an ideal choice for beginners. The melody is easy to follow, and you only need a few notes to play the entire song. Plus, it’s a great way to practice finger coordination and get used to moving across the piano keys. If you’re looking for Mary Had A Little Lamb piano sheet music, you’ll find it simple to read and play.
Getting started: finger position and notes
Before you start playing, place your right-hand fingers on the piano as follows:
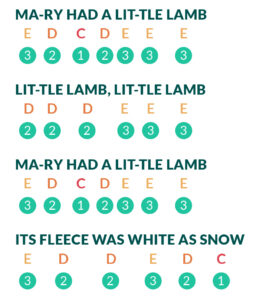
- E (3rd finger)
- D (2nd finger)
- C (1st finger, thumb)
These three notes are the foundation of the melody, making it easy to follow along, especially for those searching for beginner ‘’Mary Had A Little Lamb’’ piano notes.
Step-by-step guide to playing “Mary Had A Little Lamb”
- Start by clapping the rhythm of the song together
Count out loud, “One, two, three, four,” to really feel the beat. Once you’re in sync, try playing the notes on your instrument while continuing to count. Encourage the child to clap or tap along with you, turning it into a fun little rhythm game. It’s like a musical workout!
- Use flashcards with notes
Play a note on the xylophone or keyboard, and see if the child can match it with the right card. This is a fun way to reinforce how to play Mary Had A Little Lamb on piano while keeping them engaged.
- Make it a musical story
For each note, describe the movement, like “We’re climbing up a big hill!” for higher notes or “Sliding down a slippery slide!” for lower notes. This technique works well when practicing Mary Had A Little Lamb piano chords in a playful way.
- Now, let the child play the notes while you sing along with them
Point to each note as they play it, and if they’re ready, let them sing along with you too. Switch things up: they can sing while you play. It’s a great way to get them feeling confident with the song while making it feel like a fun duet.
This approach makes learning fun and interactive, with plenty of movement, sounds, and playfulness to help the child connect with the music naturally!
Interesting fact
Did you know “Mary Had a Little Lamb” was based on a true story? Sarah Josepha Hale wrote the famous nursery rhyme inspired by a little girl, Mary Sawyer, from Boston whose little lamb followed her to school one day in 1816.
Expanding your skills
Once you’ve mastered “Mary Had A Little Lamb,” you might want to explore more beginner-friendly songs like “Twinkle Twinkle Little Star” or “Ode to Joy.” Try experimenting with different tempos, adding variations, or even playing along with a backing track to make your practice more engaging. The key to progress is consistency, keep challenging yourself with new pieces and techniques, and most importantly, enjoy the journey of learning music! Once you’re comfortable playing it, challenge yourself by trying new songs or experimenting with different rhythms. Keep practicing, and have fun making music!
Author of this blog post:
Susana Pérez Posada

With over seven years of piano education and a deep passion for music therapy, Susana brings a unique blend of expertise to Skoove. A graduate in Music Therapy from SRH Hochschule Heidelberg and an experienced classical pianist from Universidad EAFIT, she infuses her teaching with a holistic approach that transcends traditional piano lessons. Susana’s writings for Skoove combine her rich musical knowledge with engaging storytelling, enriching the learning experience for pianists of all levels. Away from the piano, she loves exploring new places and immersing herself in a good book, believing these diverse experiences enhance her creative teaching style.